The Zero tab
Goal of this article: tell the application where your rifle is sighted in — and know when that is one number and when it is a description of the day you sighted it in.
The application solves for the zero
Most of this tab makes sense only once one idea lands. Other solvers ask you for a sight angle, or for a table of clicks you measured. This one asks you to describe the zeroing event, and then computes the sight angle that would have produced it: it runs a full trajectory at the zero distance, in the zeroing conditions, with the zeroing load, and searches for the barrel elevation and windage that put the bullet on the aim point.
That is why the tab has more on it than a distance. A zero is not a property of the rifle alone — it is the angle between the sight line and the bore that some particular afternoon on some particular range with some particular ammunition left you with. The more that afternoon differed from the shot you are now computing, the more of it you have to describe here.
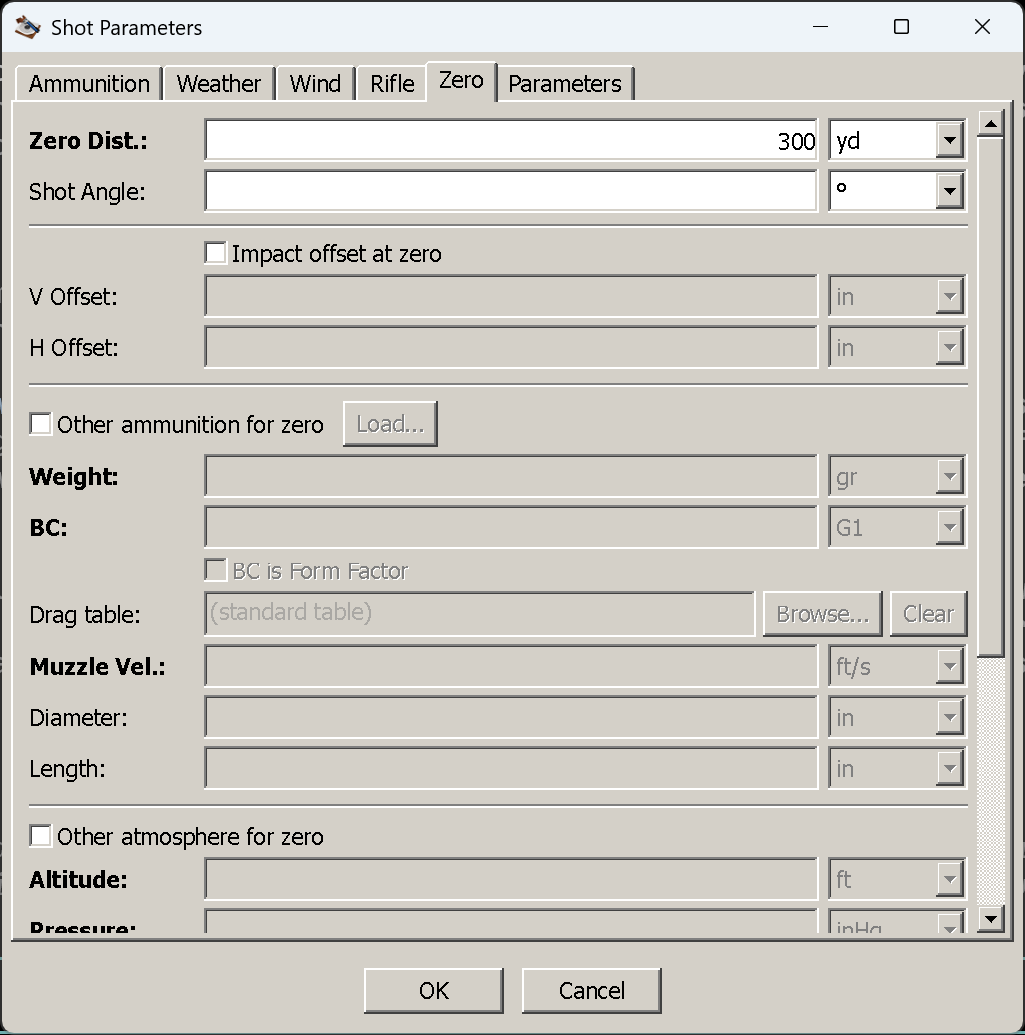
The tab scrolls; this is the top of it. The optional groups are unchecked, so their fields are greyed.
The fields
| Field | Imperial | Metric | What it is |
|---|---|---|---|
| Zero Dist. | yard | metre | The distance you sighted in at. The only field the tab needs |
| Shot Angle | degrees | degrees | The angle you were shooting at while zeroing, not the angle of this shot |
| Impact offset at zero | — | — | Checkbox enabling the two fields below |
| V Offset | inch | mm | How far the group printed from the aim point at that distance. Positive is up |
| H Offset | inch | mm | Same, sideways. Positive is left — matching the windage column’s sign |
| Other ammunition for zero | — | — | Group: a different load was used to zero. Has its own Load… |
| Other atmosphere for zero | — | — | Group: different air, with its own Reset to Standard |
| Wind at zero | — | — | Group: there was a wind while zeroing |
Left completely empty, the tab defaults to 100 yd or 100 m. If you picked a sight preset on the Rifle tab, the zero distance may already be filled in — presets carry one, and selecting a preset overwrites this field.
Scenario 1: the ordinary zero
When it applies: you sighted in with the load you are computing, on a level range, in no meaningful wind, in air not wildly different from the air you are shooting in now. That is most of the shooting most people do, and it needs exactly one number.
- Enter Zero Dist. — 100 m, 100 yd, 200 yd, whatever you actually did.
- Leave everything else alone. Do not tick anything.
- Press OK.
The drop column now reads zero at that distance, negative beyond it, and the near zero appears somewhere short of it. That is all there is to it.
What “leave everything else alone” actually means
This is the part worth understanding, because the default is not the obvious one. With the three groups unchecked, the application zeroes your rifle with:
- the same ammunition as the shot,
- the same atmosphere as the shot — whatever you entered on the Weather tab,
- no wind, and level.
Note the second one. Unchecked does not mean “standard conditions” — it means “the same conditions as the shot”. So if you tell the Weather tab you are at 5,000 ft at −10 °C, the application computes your zero in that air too: it assumes you re-zeroed this morning, where you are standing now.
Usually that is harmless, and it is worth knowing why. The zero is a sight angle, recovered from a short shot. Over 100 m, air density changes the drop by a fraction of a millimetre, so the angle it recovers is the same angle to more decimal places than your turret has clicks. The assumption only starts to bite when the zeroing shot is long enough for conditions to have moved it — and it becomes wrong in a way you can measure when the load differs, because that changes the trajectory over the zero distance a great deal more than the weather does.
Which is the whole of scenario 2.
Scenario 2: the zero that was not established under these conditions
When it applies: whenever the zeroing event differed from the shot in a way that changed where the bullet landed at the zero distance. Four groups cover it, and they are worth taking one at a time, because they matter very unequally.
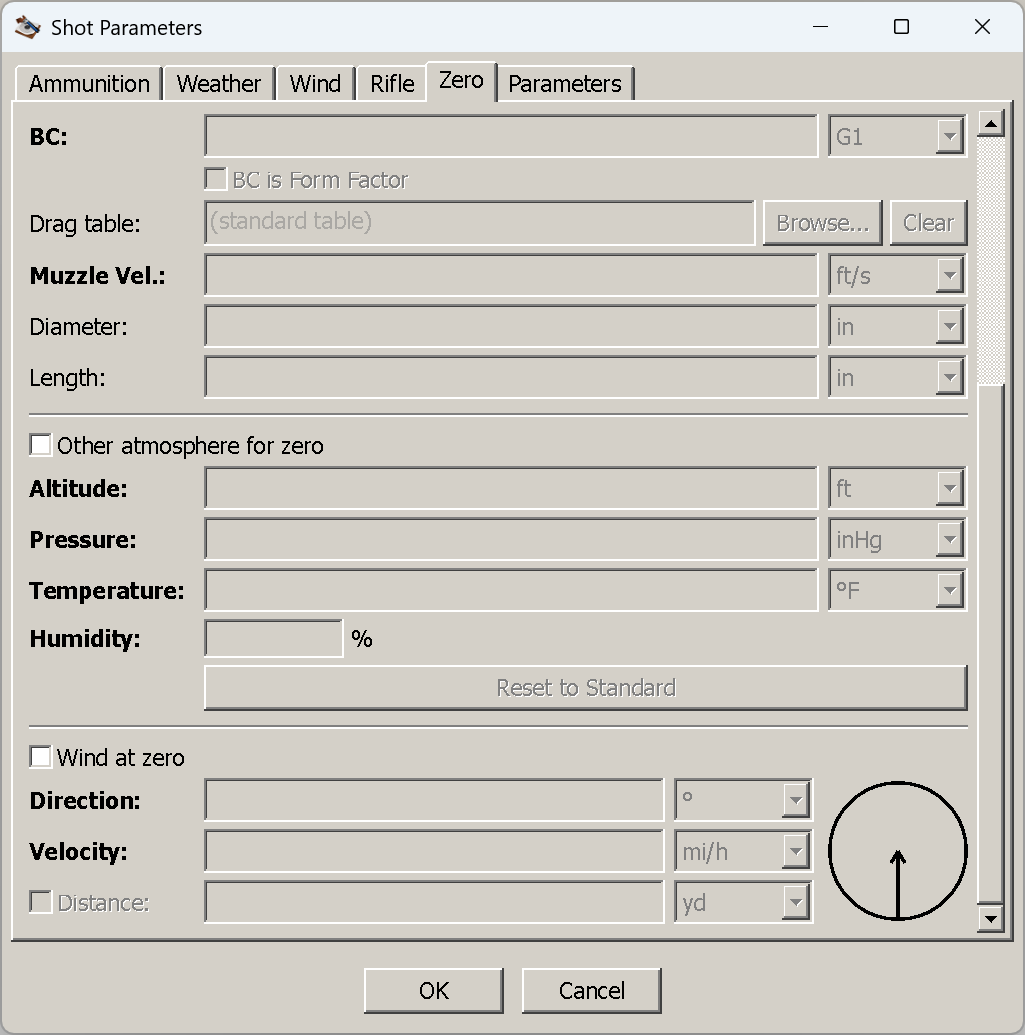
The bottom of the same tab, reached by scrolling: the rest of the zero-ammunition fields, the zero atmosphere, and the zeroing wind.
Other ammunition for zero — the one that really matters
Tick it and you get the same fields as the Ammunition tab minus the descriptive
block: weight, BC and drag table, the form-factor switch, a custom .drg, muzzle velocity, diameter and
length. Load… pulls a saved .ammox or legacy .ammo in, so a load you have already saved takes one
click.
When you need it:
- Zero supersonic, shoot subsonic. The classic, and the case this application handles that few free solvers do. You zero a .300 Blackout at 100 yd with a 125 gr supersonic load, then screw on a can and shoot the 220 gr subsonic. The subsonic round drops several feet where the supersonic dropped inches — but the sight angle is the supersonic load’s, and the subsonic trajectory has to be computed from that angle. Describe the supersonic load here and the shot’s own load on the Ammunition tab, and the drop column tells you the truth. Get it wrong and the numbers are not slightly off, they are useless.
- You zeroed with the cheap stuff. Sighted in on bulk ammunition, shooting match ammunition. Same idea, smaller magnitude.
- You are reproducing someone else’s data — a rifle zeroed by someone else, with a load you know.
Other atmosphere for zero — matters at long zero distances
Its own altitude, pressure, temperature and humidity, with a Reset to Standard button.
When you need it:
- A long zero and a big change in conditions. Zeroed at 300 m at sea level in summer, shooting at 2,000 m altitude in winter. The further out the zero, the more the air had to say about where that group landed, and the more the recovered angle moves.
- A short zero and any conditions. Not worth the typing. At 100 m you are correcting the fourth decimal place of an angle.
- Reproducing published or standard-atmosphere data, where the point is to state the conditions the zero belongs to rather than to reflect your own day.
Wind at zero — only if you dialled a wind out
One wind: direction, velocity, and a start distance pinned to 0, because a zeroing shot is short and controlled and splitting it into zones would be nonsense. It blows for the whole zeroing shot.
When you need it: you sighted in in a real crosswind and adjusted the windage until the group was centred. Your windage zero then has that wind baked into it, and every shot you compute afterwards inherits the bias. Telling the application reproduces it, so it can subtract it.
When you do not: you zeroed in still air, or in a wind light enough that you would not have chased it with the turret. Leaving this off means “no wind while zeroing”, which is what you want.
Shot Angle — for a zero established on a slope
The angle you were shooting at while zeroing. Almost always 0, because almost everyone zeroes on a flat range; fill it in only if you genuinely sighted in up or down a slope. This is not the angle of the shot you are computing — that lives on the Parameters tab, and confusing the two puts the angle in the wrong half of the problem.
Impact offset at zero — for a zero that is deliberately not centred
Tick Impact offset at zero and enter where the group actually sits relative to your aim point at the zero distance. V Offset is positive up, H Offset is positive left.
When you need it:
- A deliberate offset zero. “Two inches high at 100” is a real and common way to zero a hunting
rifle; enter
2 inand the application takes it as the zero condition rather than pretending you were centred. - A known bias you have not corrected. The rifle prints an inch left at 100 and you have run out of windage adjustment, or you simply have not touched it. Enter it and the solution accounts for it.
When you do not: if you centred the group, leave it off. And if your rifle prints off-centre because of something you can fix, fix it rather than describing it — this field propagates the bias to every distance, which is exactly what it is for and exactly what you do not want to enshrine by accident.
Deciding whether any of it matters
A short hierarchy, most significant first:
- Different load at zero — always model it. Changes the answer by feet at distance.
- A deliberate offset zero — always model it. It is a fixed bias at every range.
- A crosswind you dialled out — model it if it was real. It is a windage bias at every range.
- Different air at zero — model it if the zero distance is long (300 and up) or the conditions differ dramatically. Skip it for a 100 m zero.
- A zero established on a slope — rare enough that if you are not sure, you were on a flat range.
Everything on this tab is you telling the application the truth about one afternoon. If nothing about that afternoon differed from the shot you are computing, one number is the whole truth.
Things that catch people out
- A ticked group needs all of its fields. Tick Other ammunition for zero and forget the weight and OK reports it — “Other ammunition for zero: Bullet weight is not specified.” Until that check existed the group read as “nothing entered” rather than “half entered”, and the shot quietly computed with the zero using the shot’s ammunition.
- Unchecked means “same as the shot”, not “standard”. The most common misreading of this tab.
- A zero distance the load cannot reach. Ask a subsonic pistol load for a 1,000 yd zero and the calculation refuses rather than returning a very silly number: “This load cannot reach the zero distance”, with what to change — zero it closer, or give it more velocity or a better coefficient. It is a plain message, not a crash report, because it is a number you can fix rather than a fault in the application.
- The sight preset overwrites the zero distance. Pick the preset first, then set the distance.
- The tab scrolls. The zero atmosphere and the zeroing wind are below the fold; if you cannot find them, scroll.
- Zero shot angle versus shot angle. This tab’s angle describes the zeroing; the Parameters tab’s describes the shot.
Next
The Parameters tab — maximum range and step, this shot’s angle, dialled clicks and the Coriolis effect.